How to Add Loops to Bath Towels? 4 Easy Steps!
Adding loops to bath towels is a straightforward and simple process that involves sewing. You just need a needle, some thread, and a ribbon or piece of fabric to serve as the loop.
Loop attachment to bath towels not only simplifies the hanging process but also enhances the overall aesthetic appeal. To add a loop, first, decide where you want your loop to be.
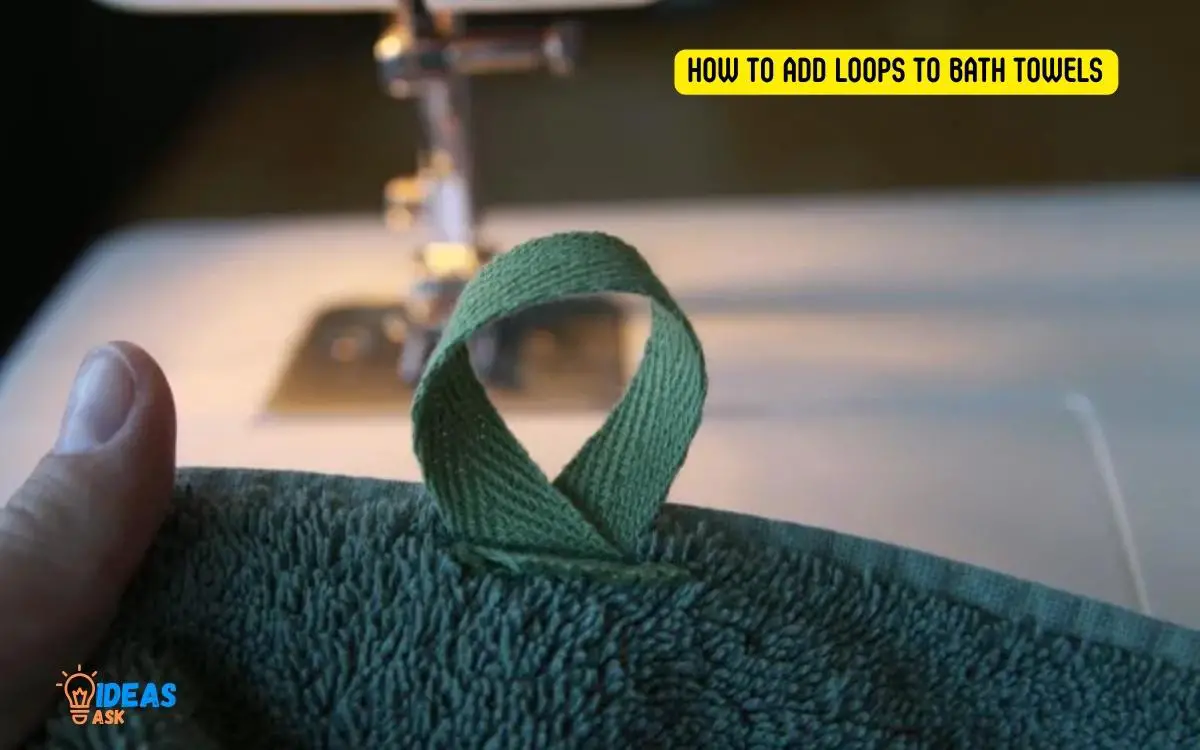
Cut a piece of ribbon or fabric about 6 inches long. Fold it in half to form a loop shape. Then, using a needle and thread, stitch both ends of the loop to the top corner of the towel. Making sure stitches are secure and the loop is firmly attached.
Adding loops to bath towels is a creative and practical way to enhance the use of everyday items. This simple DIY project not only adds usefulness but also a personal touch to your bathroom, and increases the longevity of your bath towels by ensuring proper air circulation for drying.

Key Takeaway
Step-by-Step Guide to Add Loops to Bath Towels
Materials Needed:
- Bath towel
- Sewing needle
- Thread (color matching towel)
- Scissors
- Loop fastener or cord
Step 1: Prepare the Towel
Lay your bath towel flat on a table. Smooth out any wrinkles.
Step 2: Mark the Location for the Loop
- Decide where you want to place the loop on the towel. Common locations are one short end of the towel, or one corner.
- Mark the spot with a pencil, pen, or pin.
Step 3: Sew On the Loop
- Cut an 8-10 inch length of loop fastener or cording.
- Thread your needle and tie a knot at the end.
- Sew several stitches over the mark to attach one end of the loop.
- Loop the cord or fastener and sew several more stitches to secure the other end.
Step 4: Check Your Work
- Gently pull on the loop to make sure it is securely attached.
- Trim any excess thread.
You now have a bath towel with a handy loop for hanging! Follow these steps whenever you want to add loops to towels or other items.
The Importance Of Loops In Bath Towels
Loops play a critical role in bath towels, providing convenience and functionality. Learn how to easily add loops to your towels for an improved user experience.
Loops in bath towels may seem like a small detail, but they play a crucial role in enhancing the functionality, improving convenience, and maintaining the integrity of these everyday essentials.
We will explore the importance of loops in bath towels and why they shouldn’t be overlooked.
Enhancing Functionality:
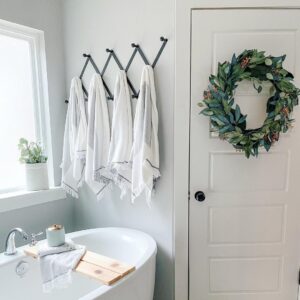
- Loops provide a practical solution for hanging towels, allowing them to dry quickly and efficiently.
- By hanging towels through loops, you can prevent them from touching the floor or other surfaces, avoiding potential contamination.
- The loops also make it easier to store and organize towels, especially in small bathrooms or shared spaces.
Improving Convenience:
- Having loops in bath towels eliminates the need for additional hooks or racks in your bathroom, saving valuable space.
- The convenience of hanging towels through loops means they are always within reach after a shower or bath.
- Loops can also be helpful when traveling, as you can easily hang your towel to dry in hotel bathrooms or beach cabins.
Maintaining Towel Integrity:
- Loops add strength and durability to bath towels, ensuring that they can withstand regular use and multiple washes.
- When properly sewn, loops become an integral part of the towel, preventing them from tearing or unraveling over time.
- The strategic placement of loops ensures that the weight of a wet towel is evenly distributed, reducing strain on specific areas and minimizing potential damage.
Loops in bath towels offer more than just a convenient way to hang your towels. They enhance their functionality, improve convenience, and maintain their overall integrity.
Whether you’re looking for practicality, space-saving solutions, or durability, don’t underestimate the importance of loops when choosing your next bath towel.
Adding Loops Using The Overhand Knot Method
Learn how to easily add loops to your bath towels using the efficient overhand knot method. This simple technique will allow you to hang your towels conveniently while adding a touch of style to your bathroom decor.
To add loops to bath towels, one commonly used method is the overhand knot method. This technique ensures a secure loop that will hold up well over time.
We will discuss how to create a secure loop using an overhand knot, the proper positioning of the loop on the towel, and how to secure the loop with multiple stitches.
Creating A Secure Loop Using An Overhand Knot:
- Start by folding one end of the towel diagonally to form a triangle shape.
- Take the folded end and roll it tightly towards the opposite end of the towel.
- Once you have a rolled towel, grab the loose end and make an overhand knot by looping it over and then under the roll.
- Tighten the knot securely, ensuring that it is snug but not too tight to prevent damaging the towel fabric.
Proper Positioning Of The Loop On The Towel:
- Identify the desired placement for the loop on the towel. This is typically near one of the corners.
- To ensure a sturdy loop, select a spot where the towel fabric is thick and tightly woven.
- Fold a small section of the towel over to create a loop, positioning it at the desired spot.
- Make sure the loop is oriented in a way that will be convenient for hanging or displaying the towel.
Securing The Loop With Multiple Stitches:
- Once the loop is positioned, thread a needle with a sturdy thread or embroidery floss.
- Start stitching near the base of the loop, making small and tight stitches to secure the loop to the towel.
- Continue stitching around the base of the loop, adding multiple stitches to reinforce its strength.
- Make sure each stitch is close together and evenly spaced for optimal durability.
By following these steps, you can easily add loops to bath towels using the overhand knot method. Creating secure loops, positioning them correctly, and securing them with multiple stitches will ensure that your towel loops are strong and long-lasting.
Enjoy the convenience of hanging your towels or displaying them with pride!
Adding Loops Using The Buttonhole Method
Learn the buttonhole method to easily add loops to your bath towels. This step-by-step guide will help you create sturdy loops for hanging your towels with ease.
Measuring and marking buttonhole size:
- It is important to start by measuring and marking the right size for your buttonholes. This will ensure that your loops are the perfect fit for your bath towels.
- Use a ruler or measuring tape to determine the desired length of your loops. Typically, loops range between 1 to 2 inches in length.
- Mark the desired length on the edge of your towel using a fabric pencil or tailor’s chalk. Make sure to mark the positions where you want to add the loops evenly across the width of the towel.
Creating a buttonhole for loop attachment:
To create the buttonhole for loop attachment, you will need a sewing machine with a buttonhole foot attachment.
Follow these steps:
- Set up your sewing machine with the buttonhole foot attachment according to the manufacturer’s instructions.
- Position the marked buttonhole starting point under the buttonhole foot, making sure the foot is lined up with the mark.
- Select the buttonhole stitch option on your sewing machine. Starting at the marked point, begin sewing the buttonhole, following the buttonhole foot’s guide.
- Continue sewing until you reach the marked endpoint of the buttonhole. Backstitch or lock stitches at the beginning and end of the buttonhole to secure the stitching.
Reinforcing the buttonhole stitching:
Reinforcing the buttonhole stitching ensures that the loops are securely attached to the towel, increasing the longevity and durability of your loops.
Follow these steps:
- Sew a second row of stitches around the buttonhole, parallel to the first row, using a regular straight stitch or a zigzag stitch. This will reinforce the buttonhole and prevent it from fraying or unraveling over time.
- Trim any excess thread and remove the fabric pencil or tailor’s chalk markings.
- Repeat the same process to add loops at all the marked positions along the towel’s edge.
- Once all the loops are attached, give your towel a final press with an iron to flatten any wrinkles or creases.
Now that you know how to add loops to your bath towels using the buttonhole method, you can easily customize your towels with convenient hanging loops. Just follow these steps, and your towels will have a functional and stylish update in no time.
Enjoy the convenience of hanging your towels with ease, while also adding a decorative touch to your bathroom.
Additional Tips For Adding Loops To Bath Towels
Discover some additional tips to effectively add loops to your bath towels. These practical suggestions will help you achieve a professional look with ease. Improve your towel hanging experience today!
Adding loops to bath towels is a simple and practical way to make them easier to hang and store. Whether you’re a DIY enthusiast or just looking for ways to enhance your bath towels, here are some additional tips to consider for adding loops to bath towels:
Selecting Loop Materials With Durability In Mind:
- Choose a sturdy material for your loops, such as grosgrain ribbon or cotton webbing.
- Opt for materials that are resistant to fraying or stretching, ensuring the loops will hold up over time.
- Consider the weight and texture of the material to ensure it complements the towel and doesn’t cause any discomfort when hanging.
Ensuring Even Loop Distribution On The Towel:
- Measure and mark the desired placement of the loops on your towel before attaching them.
- Space the loops evenly along the edge of the towel to maintain balance and prevent it from sagging when hung.
- Use pins or clips to temporarily secure the loops in place before sewing or attaching them permanently.
Testing Loop Strength Before Regular Use:
- After attaching the loops, give them a gentle tug to check their durability and strength.
- Ensure that the loops can withstand the weight of the towel when hung.
- Test the loops periodically to ensure they remain secure and can handle repeated use.
By following these additional tips, you can add loops to your bath towels with confidence, creating a convenient and functional solution for hanging and storing your towels.
Conclusion
Adding loops to bath towels can be a fun and practical DIY project. By following the steps outlined in this blog post, you can easily transform your ordinary towels into convenient hanging loops.
Not only does this add a stylish touch to your bathroom decor, but it also provides a practical solution for keeping your towels within reach.
Remember to choose the right type of loop for your towels, whether it be the button or fabric loop, and to secure them properly for durability.
With just a little time and effort, you can enhance the functionality of your towels and make your bathroom more organized.
So go ahead and give it a try, and enjoy the benefits of having loops on your bath towels. Get creative and have fun with this simple yet effective DIY project!


