How to Make a Rocket Out of Paper Towel Roll? 9 Steps!
Constructing a paper towel roll rocket is an enlightening and fun-filled activity. It involves converting a common household item into a work of art.
The process involves the use of a paper towel roll, construction paper, tape, scissors, and craft glue.
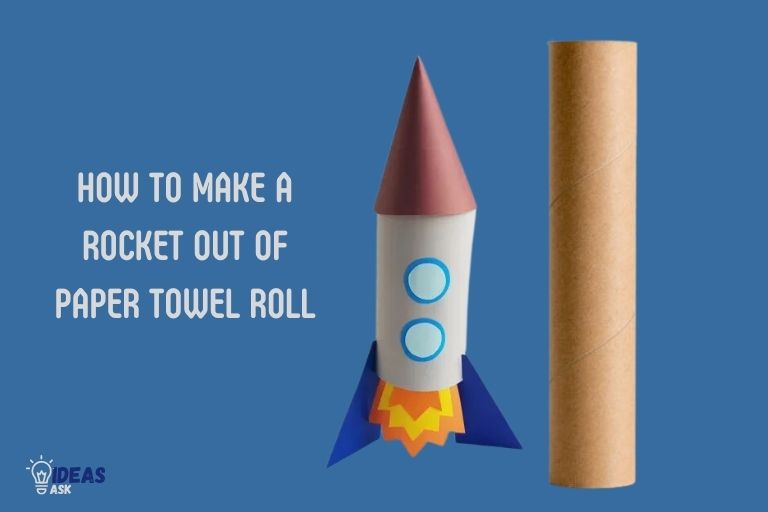
The first step in creating a rocket out of a paper towel roll involves covering the roll with construction paper.
This is followed by cutting out a circular shape and four triangles from the construction paper to make the top and fins of the rocket, respectively.
The circular shape is then folded into a cone using glue while the triangles are attached at the bottom using the same glue. The rocket is left to dry before adding any embellishments or details.
Creating a paper towel roll rocket not only provides fun-filled activity but it also imparts valuable lessons. It can be a great way to introduce kids to the world of science, particularly physics and aerodynamics.
It encourages creativity and resourcefulness by using simple, everyday materials to create something that is both educational and enjoyable.
9 Steps for Making a Rocket Out of a Paper Towel Roll
| Step Number | Instructions |
|---|---|
| 1 | Gather Materials: Paper towel roll, craft paper, scissors, glue, tape, string, marker |
| 2 | Cut the craft paper: Cut a semi-circle out of your craft paper, this will form the cone of the rocket |
| 3 | Make the cone: Roll the cut-out craft paper into a cone shape and secure it with glue or tape |
| 4 | Attach the cone: Glue or tape the cone to the top of the paper towel roll |
| 5 | Cut out Fins: Cut out 3 or 4 triangle shapes from the craft paper for the rocket’s fins |
| 6 | Attach the fins: Attach the fins to the bottom of the paper towel roll using glue or tape |
| 7 | Decorate the rocket: Use markers to draw on the rocket, adding designs or a flame at the bottom |
| 8 | Attach the string: If desired, attach a string to the top of the rocket for hanging or flying |
| 9 | Let dry: Allow any glue or markers to fully dry before playing with the rocket |
Key Takeaway
Five Facts About Making a Rocket Using a Paper Towel Roll
Materials Needed
Detailed List Of Materials Required:
If you want to make a rocket out of a paper towel roll, you’ll need some basic materials.
Here’s a list of everything you’ll need:
- A paper towel roll or a toilet paper roll
- Scissors or a craft knife
- Paint or markers
- Glue or tape
- A ruler
- Construction paper in various colors
- Aluminum foil
- Rubber bands
- Glitter or other decorative materials
- A launchpad (optional)
Now, let’s take a closer look at each of these materials:
- Paper towel roll or toilet paper roll: The main base of your rocket will be the roll. It should be clean and dry before use, and you can use either a paper towel roll or a toilet paper roll.
- Scissors or a craft knife: You’ll want to use scissors or a craft knife to cut the paper towel roll into the desired shape. Be sure to handle sharp cutting tools with care and keep them away from children.
- Paint or markers: Use paint or markers to add some color to your rocket. You can use any color you like, but metallic colors or bright shades work well.
- Glue or tape: You’ll need something to hold your rocket together. You can use glue or tape, depending on your preference and the materials you have available.
- A ruler: A ruler will come in handy when you’re measuring and cutting the paper towel roll.
- Construction paper in various colors: You can use construction paper to create fins or other decorative elements for your rocket.
- Aluminum foil: Aluminum foil can be used to cover the paper towel roll and make it look more like a rocket.
- Rubber bands: You’ll need rubber bands to hold the fins or decorative elements in place.
- Glitter or other decorative materials: Add some sparkle to your rocket with glitter or other decorative materials.
- A launchpad (optional): If you want to launch your rocket, you can make a launchpad out of cardboard or other materials. However, this is optional and not necessary for the rocket-making process.
So, gather up these materials and let’s get started on making our paper towel roll rocket!
Cutting And Folding The Paper Towel Roll
Making a rocket out of paper towel rolls is an exciting craft project that both children and adults can enjoy.
Cutting and folding the paper towel roll is the first and most crucial step in creating the rocket’s body. With the proper technique and attention to detail, you will achieve a symmetrical and neat result.
Detailed Instructions On How To Cut And Fold The Paper Towel Roll To Form The Body Of The Rocket
To begin with, follow these simple steps to create a paper towel roll rocket:
- Flatten the paper towel roll to let it lay flat on the surface.
- Place the roll on a cutting mat and use a ruler to measure and mark the height of the rocket. (it is best to cut the roll in half if you want to create two different parts of the rocket.)
- Cut the paper towel roll with sharp scissors along your measured mark.
- Fold one end of the roll towards the center and crease it properly. Repeat the same process with the other end of the roll until they overlap each other.
- Secure the two ends of the roll using a glue stick or tape to make sure that they stick well and form a tight seal.
Tips On How To Ensure That The Folding Is Neat And The Roll Is Symmetrical
Follow these tips to make sure that you achieve a neat and symmetrical rocket roll:
- Use a sharp pair of scissors to cut the paper towel roll to avoid damaging it.
- Make sure to mark the roll correctly using a ruler to create even and balanced cuts.
- Take your time when folding the ends and crease them properly to create sharp folds.
- Check to see if both ends of the roll overlap each other symmetrically to create a rocket shape with a pointed nose and tail.
- Use a glue stick or tape to secure the ends tightly for a neat and stable rocket body.
Following these instructions and tips, you can create an impressive rocket craft piece out of paper towel rolls that everyone will cherish. So, let your creativity take over and enjoy creating your own rocket model!
Decorating The Rocket Body
Decorating the rocket body is where kids can unleash their creativity and imagination, giving their rockets a personalized touch.
Here are some creative ideas on how to decorate the rocket body to make it look like a space rocket:
Paint It Like A Real Rocket
One way to make the paper towel rocket look more like a real space rocket is to paint it. Use colors like white, silver, or gray to mimic the colors of spaceships.
You can also add small details like flames, stars, or even a nasa logo to make it look like a more authentic rocket.
Add 3D Elements
Another way to make the rocket stand out is to add 3d elements. You can add fins at the bottom of the rocket or create a cone for the top of the rocket to give it an authentic look.
The fins can be easily made with construction paper and attached to the cardboard tube with glue. A cone can be made by rolling a piece of construction paper into a cone shape and gluing it to the top of the rocket.
Use Stickers
Stickers are another great way to decorate a rocket. Kids can choose from a variety of space-themed stickers to add to their rocket. This will give the rocket a unique and personalized look.
Glitter And Sparkles
For a more sparkling and shiny finishing touch, add some glitter or sparkly stickers to the rocket. This will make the rocket stand out and add a fun twist to the decoration.
With these ideas, kids can have fun personalizing their paper towel roll rockets and use their imagination to create their own designs. Remember to encourage creativity and let them take the lead in decorating their rockets.
Making The Launch Pad
Your rocket is almost ready for launch and now it’s time to make the launch pad. This is an essential component for a successful rocket launch. Here’s how to create a launch pad from a cardboard sheet.
Detailed Instructions On How To Make A Launch Pad With A Cardboard Sheet
- Take a cardboard sheet and cut it to the desired size of the launch pad.
- Roll the edges of the cardboard sheet inwards, creating a box-like shape.
- Apply glue on the inside of the corners where the cardboard is joined. Hold the cardboard sheet in place until the glue dries.
- Cut another cardboard sheet into strips about two inches in length and three-fourth inch wide.
- Place the four strips inside the box. These strips will serve as the legs of the launch pad.
- Apply glue to the bottom of the strips and attach them to the bottom of the box.
- Hold the strips in place until the glue dries.
- Cover the cardboard box with a layer of aluminum foil.
Tips On How To Ensure That The Launch Pad Is Stable And Secure
- Use a thick cardboard sheet to make the launch pad. This adds stability to the box.
- Make sure that the glue is evenly applied to all the joints. Uneven application of glue can cause instability in the launch pad.
- Keep the legs of the launch pad even in length. This will ensure that the rocket is launched straight into space.
- Make sure that the launch pad is on a flat and stable surface before launching the rocket.
- Secure the launch pad to the launch area with duct tape to prevent it from bouncing or moving during the launch process.
Now that we have a sturdy launch pad, it’s time to prepare for liftoff. In the next section, we’ll cover all the pre-flight steps you need to take before launching your rocket into space.
Step-By-Step Guide On How To Attach The Paper Towel Roll Rocket To The Launch Pad
Attaching the rocket to the launch pad is the final step to launch a paper towel roll rocket. In this step-by-step guide, we will explain how to ensure that your rocket is firmly attached and does not fall down.
Follow these simple instructions to attach the rocket to the launchpad securely:
- Cut a strip of cardboard to create a launchpad with a flat surface that holds the rocket in place. It must be wide enough to accommodate the bottom of the paper towel roll.
- Apply craft glue to the bottom of the paper towel roll and place it on the cardboard. Hold the rocket for a few seconds to ensure that it’s stable.
- Wrap a piece of elastic band around the body of the rocket, below the cardboard, to secure it in place. A rubber band would work too, just make sure not to tighten too much to avoid damaging the rocket.
- Set the launchpad with the attached rocket on a flat surface, preferably outdoors, to prepare for launch.
Ensuring that your rocket is firmly attached to the launchpad is crucial in rocket launching. Follow these instructions, and you’ll have a rocket ready for takeoff.
Remember to remove the elastic band and set up a safe distance before launching the rocket.
Happy flying!
Preparing For Launch
Rocket launching is every child’s dream, and what if i say, you can make your diy paper towel roll rocket. Yes, it’s possible, and here i am to guide you through it.
Before we begin, let’s prepare for launch, and take a look at some essential safety precautions and tips regarding the ideal launch location.
Safety Precautions To Take Before Launching The Paper Towel Roll Rocket:
Here are some crucial safety precautions that can help you avoid any accidents or mishaps during the paper towel roll rocket launch:
- Wear protective eyewear and gloves while making and launching the rocket.
- Use scissors and other sharp objects with adult supervision, and keep them away from children.
- Do not aim the rocket towards people, animals or homes.
- Remove any flammable objects from nearby before launching.
- Keep a bucket of water or a fire extinguisher nearby in case of an emergency.
Tips On Choosing The Right Location To Launch The Rocket:
Choosing the right location for launching your paper towel roll rocket is crucial and can help you improve your experience.
Here are some tips to help you choose the right location:
- Choose an open area with no trees or buildings around. It can help you avoid any obstruction during the rocket’s flight.
- Choose a location with a smooth surface to launch the rocket easily.
- Avoid launching rocket in areas with high traffic or crowded neighborhoods.
- Do not launch the rocket near power lines or in adverse weather conditions.
These safety precautions and tips will help you prepare for a successful paper towel roll rocket launch experience. Remember, safety comes first, so always prioritize it.
Igniting The Rocket
Explanation Of How To Ignite The Rocket Using Vinegar And Baking Soda
To ignite the paper towel rocket using vinegar and baking soda, follow these steps:
- Gather the necessary materials, which include a small paper towel roll, baking soda, vinegar, and a tissue paper.
- Pour baking soda into the paper towel roll, filling it up to 1/3 of the way.
- Drench a tissue paper in vinegar and wrap it around the other end of the paper towel roll to seal it.
- Place the paper towel rocket on a flat surface, with the vinegar-soaked tissue paper on top.
- Wait for a few seconds as the vinegar soaks into the baking soda, creating a chemical reaction that will generate gas and cause the tissue paper to burst.
Note that the reaction will generate carbon dioxide gas, which can lead to the tissue paper popping out of the top end of the paper towel roll. This reaction is quite safe, making it ideal for kids to attempt.
Alternative Methods Of Igniting The Rocket For Those Who Do Not Want To Use Vinegar And Baking Soda
Some people might prefer an alternative way of igniting paper towel rockets.
If you don’t want to use vinegar and baking soda, you can try the following methods:
- Use alka-seltzer tablets: Crush up a few alka-seltzer tablets and add the powder to the paper towel roll. Pour some water into the roll, close it up with tissue paper, and wait for the gas to create enough pressure to push the tissue paper off the top.
- Use a matchstick: Place a small piece of tissue paper into the paper towel roll and use a matchstick to light it up. The tissue paper will generate enough heat to ignite the rocket and create a fun reaction.
Note that if using a matchstick, ensure that it is lit only by an adult and that everyone involved takes necessary precautions for safety.
FAQ On Making A Rocket Out Of Paper Towel Roll
How Do You Make A Rocket Out Of A Paper Towel Roll?
To make a rocket out of a paper towel roll, you will need some simple materials like scissors, glue, and craft paper.
What Can You Use If A Paper Towel Roll Isn’T Available?
If a paper towel roll isn’t available, you can use a cardboard roll from aluminum foil or wax paper instead.
How Do You Decorate The Rocket Made From A Paper Towel Roll?
You can color the craft paper with crayons or markers, cut out shapes from construction paper, and stick them onto the rocket to decorate it.
Can Kids Make A Rocket Out Of Paper Towel Rolls?
Yes, making a rocket out of a paper towel roll is a fun and easy craft activity for kids of all ages. Adult supervision is recommended.
What Educational Benefits Come From Making A Rocket Out Of A Paper Towel Roll?
Making a rocket out of a paper towel roll can improve a child’s creativity, spatial skills, and understanding of science concepts like propulsion and gravity.
Conclusion
By now, you should have transformed your paper towel roll into an impressive rocket using the easy-to-follow steps mentioned above.
As you’ve probably noticed, this activity is not only a great way to keep kids entertained but also an excellent educational experience.
Through this diy project, children can learn about the science of rockets, and also develop their creativity and imagination.
With the right materials, time, and patience, anyone can take on this project and achieve impressive results.
So, get those paper towel rolls out, and launch your very own rocket into the sky! We hope this article has been informative and enjoyable.
Happy crafting!

